First tutorial here. I tried to get pictures of everything so here we go!

Step1: Gather your fabric. I've got a thinner sweatshirt material in grey and ribbing in purple.

Step 2: Find a shirt or sweatshirt that is the right size. It doesn't have to be hooded. I grabbed a 2T sweatshirt because I didn't want to worry about seam allowances (I know, lazy). If you are using a shirt that just fits make sure to add 1/2 inch on all sides for seam allowances. Trace the shirt body first making sure to respect the different necklines in the front and back.
 |
| I wore this shirt when I was little! |
 |
| See, different neck lines. |
Draw a straight line from the armpit to the neckline. We're making a raglan style sweatshirt.
Step 3: Trace the sleeves. There should be a corresponding straight line from the armpit of the sleeve to the shoulder. I also added a notch 3 inches from the armpit so that I could match the sleeves with the body of the shirt a little better.
 |
| These are my 2 pattern pieces so far. |
 |
| A zoom of the notch. Professional huh? |

Next flip the right sides together and sew up the sides and on down the sleeves like this:

Step 5: Make the hood. At first I drew a shape like this.
 |
| Too small hood piece. |
I didn't measure, and that was a mistake. The hood was too small. I ended up sewing it on because I didn't think to try just the hood on Little C....I sewed it to the pieces and got this:
 |
| I didn't know her cheeks could look any bigger. |
 |
| It's okay Mom, try again! |
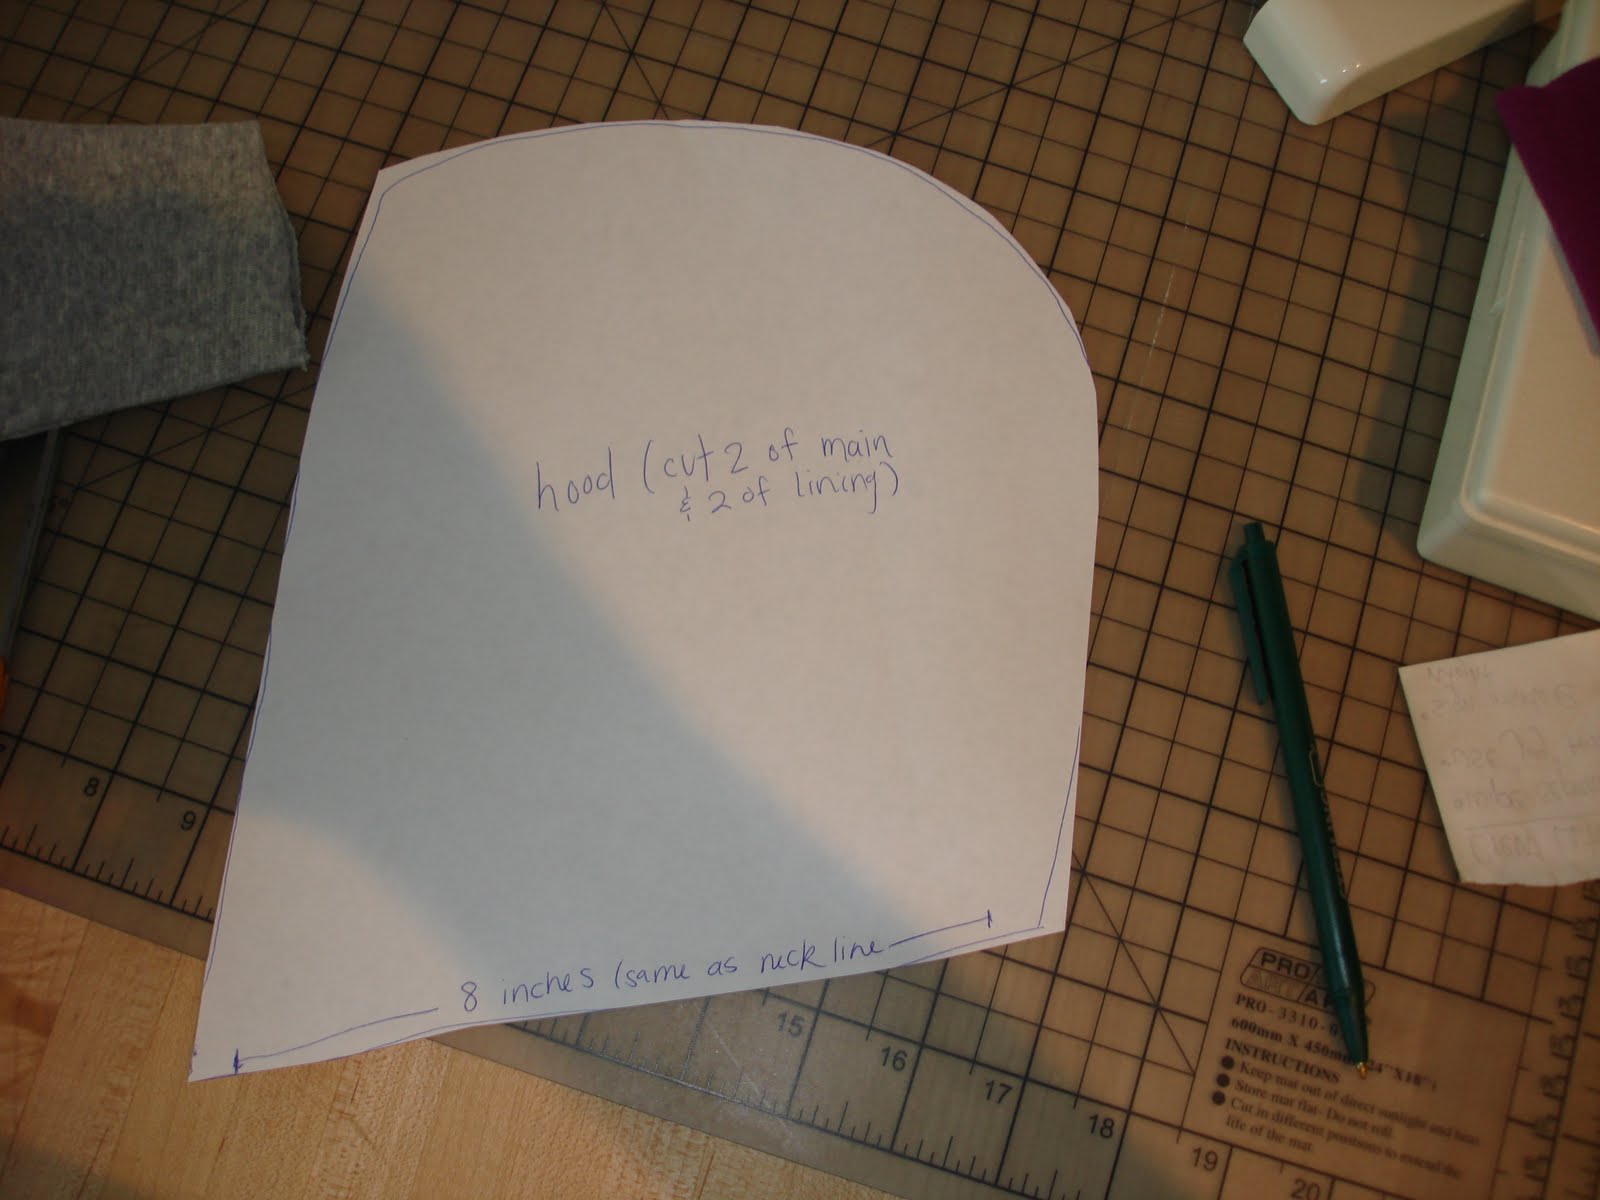
Moral of the story, measure! To cut the hood piece first measure the neckline. Divide that number in half and that is how long the bottom line of your hood needs to be. Little C's neckline was 16, so the bottom of the hood was 8 inches. See?
Cut 4 pieces. 2 for the outside and 2 for the lining. If you wanted to, you could line it with some cool crazy fabric, or flannel to make it warmer. I just used the same knit.
I didn't take extensive pictures at this point. I was excited to see if the hood was the right size and sewed it together too quick. You should take the lining and the main pieces and sew around the curved edge, right sides together. Then fit them inside one another and sew along the straight edge that will eventually frame the face. Your measured neckline will be the only side open and it should look like this:

Try it on your little one at this point. You will appreciate it later. If it fits, baste the neckline and pin and sew it on the body of your sweatshirt. Almost there!

Step 6: Next measure for cuffs and the bottom ribbing. cut blocks that are 1/2 to 1 inch smaller than the sleeves and 1 to 2 inches smaller than the bottom of the sweatshirt so it will fit snug. Make sure to cut the fabric so it will stretch around their little wrists and keep the cold out. The lines in the fabric will be parallel to their chubby little arms when they are wearing it.
 |
| Sew up the side. |
 |
| Fold it in half and slip it over the sleeve. Sew around the edge and turn it right sides out. |
Yay! A sleeve!

Repeat this for the other sleeve and the bottom of the shirt.
Step 6: Add a kangaroo pocket. Every sweatshirt, no matter how small, needs pockets. Where else would you put the extra pacifiers? Cut a piece like this:


Woooo! Ready to hang out on the couch with dad and watch Barney!

If you have any questions please ask! I would love to help.
No comments:
Post a Comment